These are the instructions for those without a FAS RC account or access to the Cannon cluster. Data will be downloaded locally and you will need to install software on your computer to follow along with the workshop. Please confirm you have followed the instructions on this page BEFORE class by replying to the e-mail you received about the workshop. We will unfortunately be UNABLE to help you with these steps during class.
For this with a FAS RC account, see the following instructions to get started:
Hello! Today we'll be going through some hands-on activities to help you get familiar with some basic tools and file formats used in bioinformatics and genomics research.
There are several things you'll need to do BEFORE class. For those of us without a FASRC account, we'll be installing some software locally on our computers and downloading the workshop data.
This workshop also assumes you have some basic knowledge of the Linux command line. If you know several simple commands like ls,
cd, cp, and mv you should be ok. However, we won't be teaching these
basics in this course, so if you aren't familiar with them you may find the course difficult to follow.
Please confirm you have followed the instructions on this page BEFORE class by replying to the e-mail you received about the workshop. You may come to hour office hours or arrange to meet with us individually for help, but we will unfortunately be UNABLE to help you with these steps during class.
For Windows users, you'll need to install a Linux distribution within your Windows operating system. Don't worry! This is easy now with the Windows Subsystem for Linux (WSL). Follow the link below for instructions on how to install WSL:
How to: Install WSL
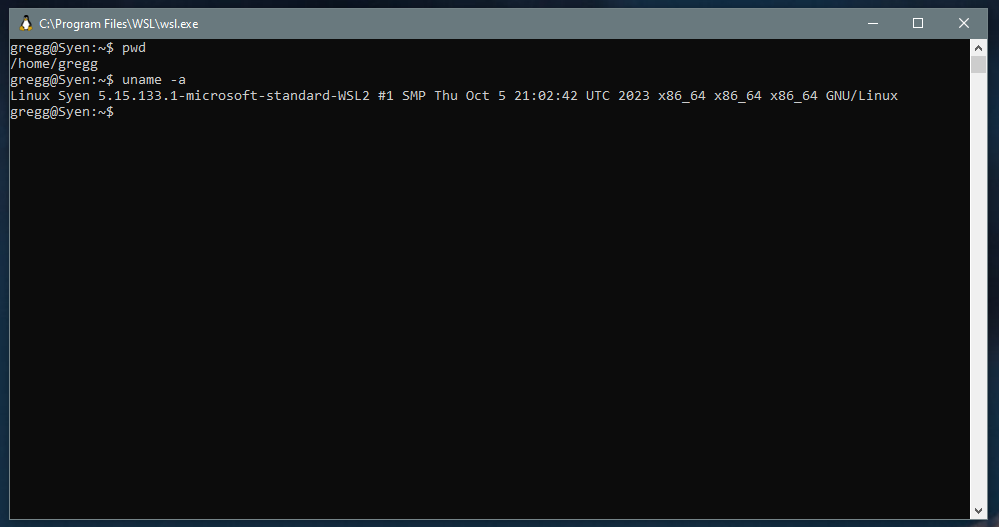
This may take some time, and your computer may restart a few times. Once WSL is installed, you'll have a Linux terminal available to you in Windows. You can open this terminal by typing "wsl" in the search bar and clicking the app that appears:
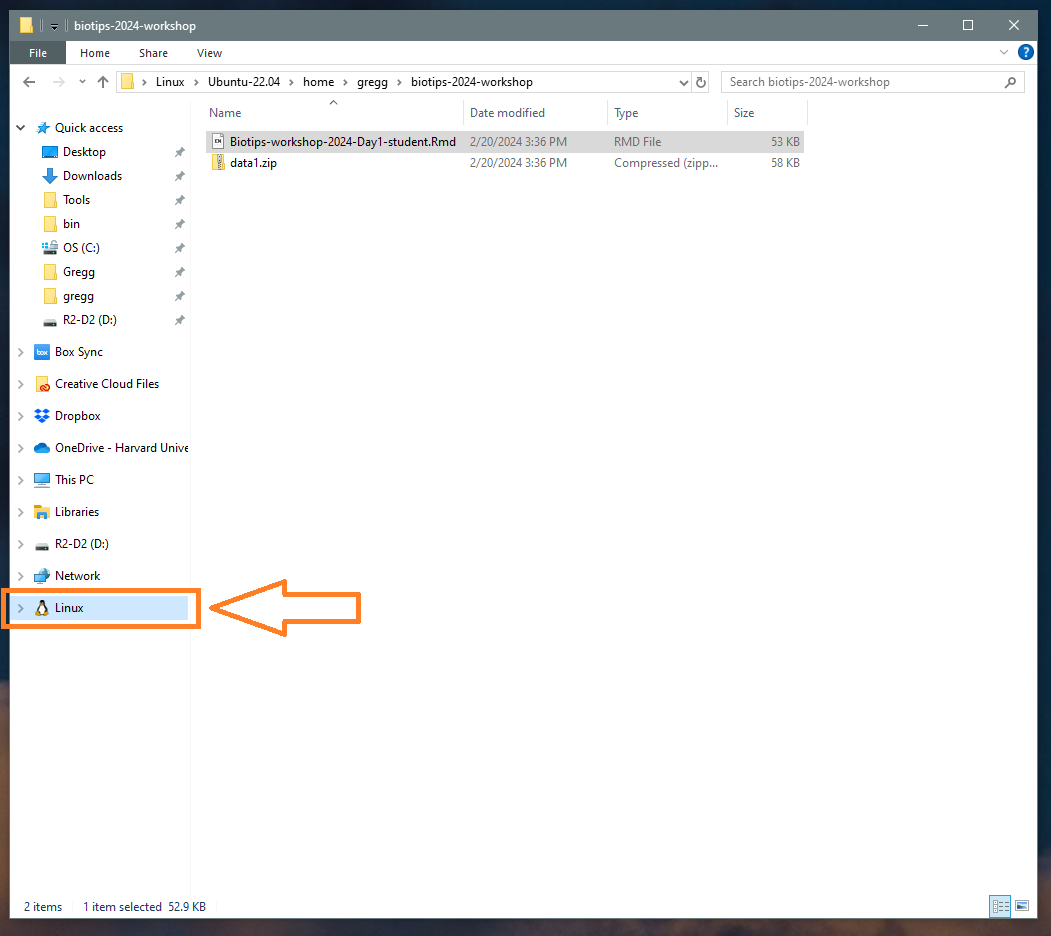
Also, once you have WSL installed, your Linux distribution will appear in your Windows file system as a mounted drive in the file explorer:
Mamba is a package manager that allows us to easily install other software. You'll need to install mamba to install the other software you'll need for the workshop. Follow the link below for instructions on how to install mamba:
Mac users:
All commands should be run in your terminal: WSL for Windows, Terminal for Mac.
For Macs, we're going to install mamba via homebrew, another package manager specific to MacOS. If you already have homebrew installed (i.e. you can type the command brew in your Terminal and
don't get a "command not found" error), you can skip this step. If not, use the following command to install homebrew:
/bin/bash -c "$(curl -fsSL https://raw.githubusercontent.com/Homebrew/install/HEAD/install.sh)"
Now, you should be able to type brew in your Terminal and not get an error. If you do still get an error, try restarting your Terminal and trying again.
Once you have homebrew installed, you can install mamba with the following command:
brew install miniforgeAnd then initialize mamba with the following command:
conda init zshWindows users:
For Windows, you'll need to install mamba (aka miniforge) via your new Linux terminal (WSL). Open the terminal and follow the instructions at the link below to install mamba:
How to: Install mamba
Basically, at the link above, follow the link tot he miniforge repository. There, select the Linux (x86_64) installer and download it. Then in your Linux (WSL) terminal, navigate to the directory where you downloaded the installer and run the installer with:
bash Miniforge3-Linux-x86_64.shThen, follow the on-screen prompts to complete installation. Restart your terminal and you should be able to use mamba.
It will be helpful for you to have a dedicated directory on your computer for the workshop. You can download the data and file for each day into this directory. You can create the directory manually through your OS's gui, or in your terminal (WSL for Windows, Terminal for Mac) with the following command:
mkdir biotips-2024-workshopThen, navigate into the directory with:
cd biotips-2024-workshop
Note that this will create a directory called "biotips-2024-workshop" in your current working directory. If you want the directory somewhere else, you can specify the path or
navigate to the desired location before running the mkdir command.
Once you have mamba installed, you can load the workshop environment. We've created an environment file that contains all the software you'll need for the workshop. You can download this file from the link below:
Download the environment file by clicking here or by running the following command in your terminal:
wget https://harvardinformatics.github.io/workshops/2024-spring/biotips/env.ymlOnce you have the file, you can create the environment with the following command:
mamba env create -f env.ymlNewer Macs (OSX ARM64) need an additional parameter to correctly install the environment. If you have a newer Mac, use the following command instead:
mamba env create -f env.yml --platform osx-64This will create a new environment called "biotips" on your computer. You can activate this environment with the following command:
conda activate biotipsWith the environment installed and activated, you should be able to access the software needed for the workshop. You can test this out by typing some of the following commands:
bcftools --version
samtools
bedtools
If any of these give you an error, you'll have to figure out what went wrong. Otherwise, you can download the data for each day below.
Each day, you will need to download two things: (1) The workshop data (.zip files) and (2) the workshop file (.Rmd files). The links to these files will become available as the date of the workshop approaches.
1. Workshop data (.zip files)
Use the following links to download the data for each day:
Day 1 data download:
-
Download Day 1 data by clicking here or run the following command in your terminal:
wget https://harvardinformatics.github.io/workshops/2024-spring/biotips/data1.zip
Day 2 data download:
-
Download Day 2 data by clicking here or run the following command in your terminal:
wget https://harvardinformatics.github.io/workshops/2024-spring/biotips/data2.zip
Day 3 data download:
-
Download Day 3 data by clicking here or run the following command in your terminal:
wget https://harvardinformatics.github.io/workshops/2024-spring/biotips/data3.zip
Day 4 data download:
-
Download Day 4 data by clicking here or run the following command in your terminal:
wget https://harvardinformatics.github.io/workshops/2024-spring/biotips/data4.zip
Once you have the .zip file downloaded and placed in your workshop directory (see box above), you'll want to open your terminal program (WSL for Windows, Terminal for Mac) and
navigate to the directory where you downloaded the file. Then, you can extract the contents with the mkdir command, e.g.:
unzip data.zip2. Workshop file (.Rmd files)
Use the following links to download the workshop file for each day:
Day 1 workshop download:
-
Download the Day 1 workshop file by clicking here or run the following command in your terminal:
wget https://harvardinformatics.github.io/workshops/2024-spring/biotips/Biotips-workshop-2024-Day1-student.Rmd
Day 2 workshop download:
-
Download the Day 2 workshop file by clicking here or run the following command in your terminal:
wget https://harvardinformatics.github.io/workshops/2024-spring/biotips/Biotips-workshop-2024-Day2-student.Rmd
Day 3 workshop download:
-
Download the Day 3 workshop file by clicking here or run the following command in your terminal:
wget https://harvardinformatics.github.io/workshops/2024-spring/biotips/Biotips-workshop-2024-Day3-student.Rmd
Day 4 workshop download:
-
Download the Day 4 workshop file by clicking here or run the following command in your terminal:
wget https://harvardinformatics.github.io/workshops/2024-spring/biotips/Biotips-workshop-2024-Day4-student.Rmd
The workshop file (.Rmd) must be placed in your workshop directory and one level above the data directories. You can download it directly into the directory, or download it elsewhere and move it into the directory.
We have implemented the workshop as an Rmarkdown file. This is a file that contains both text and code. While this has several advantages for us, it is ultimately a plain text file and should be somewhat readable in any text editor.
Please open this file in any text editor you like and take a look at the contents and follow along with the workshop. For those with R and Rstudio installed, you can also open it in RStudio, which is a program specifically designed for working with Rmarkdown files.
At the end of each day, we will provide the rendered workshop file for that day with answers to all the exercises. You can use this file to review the material from the day: